50 Metal Detecting Tips to Find Gold

Metal detecting for gold is one of the most exciting hobbies out there! But finding gold can be very difficult, and simply having a metal detector does not guarantee you will strike gold.
That’s why, we encourage you to check out our 50 tips for metal detecting for gold to increase your chances of success. You may also want to view our interactive table below, as well, which showcases some of the top metal detectors on the market that are great at detecting gold.
| Photo | Model | Price | Features |
|---|---|---|---|
 | XP Deus Wireless | $$$ | 11” DD Coil |
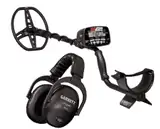 | Garrett AT Max | $$$ | Waterproof to 10 feet |
| Bounty Hunter TK4 Tracker IV | $ | 8” Waterproof Coil |
1) Do Research on Gold Detecting
Before heading out to detect for gold, be sure to do some research on gold detecting. Don’t head out with unrealistic expectations of bringing home a huge nugget like the one on display at the Golden Nugget in Las Vegas.
Most gold nuggets are under one gram in weight, and thus, very small. Most gold is found in areas with highly mineralized soils in locations where it was previously discovered and recovered. Know what you are getting into before you start. Don’t just pick up a metal detector and expect to strike it rich!
2) Research Your Local Area
It is important to research your local area and know where the best places to look. Not all areas are equal when it comes to gold nuggets. Areas where previous mining activity have taken place often have smaller bits of gold mixed in with larger bits. When mining activities were in place, they were concerned more with larger pieces of gold and may have left behind smaller pieces.
The top 8 places to find gold in the United States are:
- American River, California
- Fairbanks, Alaska
- Black Hills, South Dakota
- Northern Nevada
- Pike’s Peak, Colorado
- Rogue River, Oregon
- Dahlonega, Georgia
- Feather River, California
The Yukon region and Atlin, British Columbia, Canada are also well-known places to find gold, if you happen to be in the Great White North. This is not to say that there isn’t gold in many, many other locations. These are just the sites where the most gold is located.
3) Choose the Right Metal Detector
Not all metal detectors are created equal, and as such, not all are great at locating gold, especially if the gold is in small pieces. Many VLF (very low frequency) detectors have difficulty in highly mineralized soils, which is commonly where gold is found. Some have better ground balancing than others.
The high level of minerals can cause the detector to give false readings or have a difficult time pinning down a target. I have experienced this personally while detecting in Utah and Idaho. Both areas have highly mineralized soils are known areas where gold and precious metals have been mined.
PI (pulse induction) detectors are often better at ground balancing minerals right out of the box but can be quite a bit more expensive. Always do your research before buying a metal detector.
4) Choosing a VLF Detector
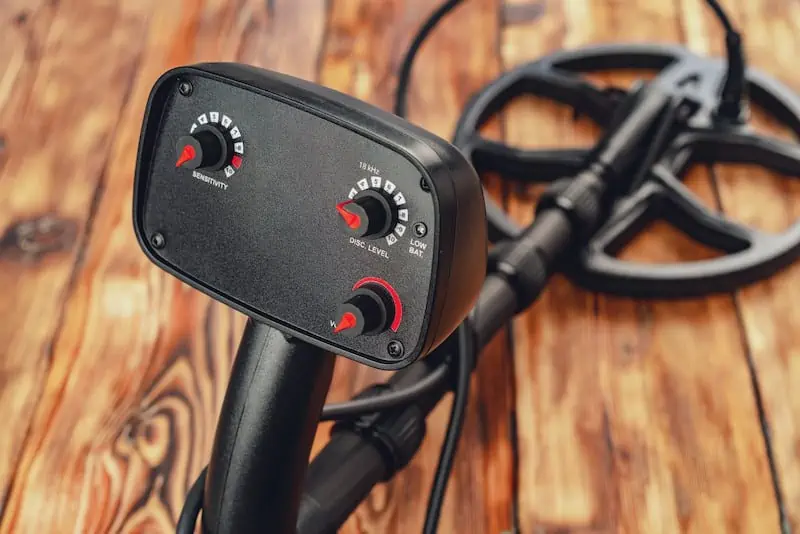
If you want a VLF detector, you must be sure you chose a model that is specifically made for gold or has very good ground balancing. VLF detectors are typically easier to use and are recommended for beginners or intermediate detectorists.
I will share my top 2 detectors with you here. Fisher Gold Bug 2 is an easy to use detector for new or intermediate detectorists. It has dual control ground balance and is very sensitive to small nuggets.
The Garrett AT Gold is designed for enhanced detection of small nuggets, jewelry and coins, and has good depth. This detector is designed for beginners or more advanced detectorists.
5) Choosing a PI Detector
PI detectors are known to detect at greater depth than most VLF detectors and are generally better at ground balancing. PI detectors are traditionally built for more advanced detectorists. These detectors can ignore highly mineralized soils and the best metal detectors for finding gold.
My recommendation for PI detectors for gold are the Garrett ATX and White’s TDI SL. The ATX is an all-terrain detector so it will work well on both land or in water and can reach detecting depths of 19”. The TDI SL was designed for prospecting and offers great depth.
6) Choose the Proper Accessories
As with any type of detecting, you will want to ensure you have all the proper accessories along on your hunt. You will want a good pick hammer to break through rocky ground or separate gold bearing rock. Some type of scoop or shovel should come along, as you will likely be moving a decent amount of earth to find your targets.
I recommend bringing along high quality metal detecting headphones so you can hear even the faintest notification on your detector. You will also want a vial or some type of secure container for your gold.
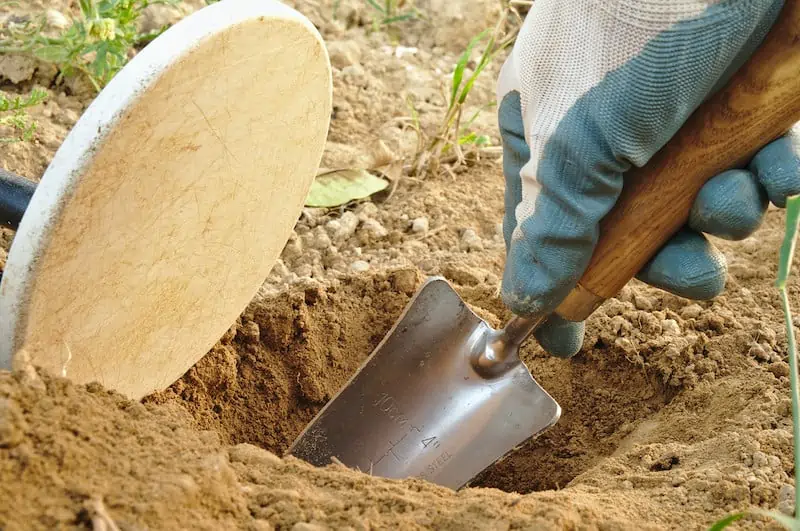
I recommend a snifter/vial combo for those small pieces or flakes of gold. You may also want to take a magnet with you to help pick up iron and hot rocks before digging for targets. This can help eliminate false readings. If you plan to metal detect in water, bring along a gold pan to help you sort through soils.
Consider taking a paper map with you. GPS devices or cell phones have limited battery power, so map your route on a standard map to keep yourself from getting lost.
- You might also want to read: 10 Metal Detecting Accessories Needed for Treasure Hunting
7) Choosing a Pinpointer
When you have found a target and dug a hole attempting to get to your find, it is always a good idea to bring along a pinpointer. These miniature detectors make it much easier to dig a smaller hole and find exactly where your target is located.
My favorite gold detecting pinpointer is the Garrett Pro Pointer AT, aka the Garrett Carrot due to its many successes in finding gold. This pointer is all-terrain, so whether your find is on land or in water, this pointer will work well.
8) Choose the Right Search Coil
Many metal detectors will have options for search coils. They can come in a variety of shapes and sizes. Concentric search coils will search deeper than wide scan coils but will not discriminate the same. Larger coils can find larger nuggets buried deeper. Smaller coils can easily get into smaller spaces and can operate more smoothly in mineralized soils.
Be sure to research which type of coil works best for the type of environment you will be hunting. For example, concentric coils are the best coil type for forested areas, as they typically search deeper.
9) Know How to Tune Your Detector
One of the first things you will want to learn is how to ground balance your metal detector. As most goldfields contain highly mineralized soil, the detector will behave erratically. It will be difficult to hear a gold target among all the other noises.
Each detector has its own ground balancing, and some are automatic. Be sure you read the manual thoroughly and understand how to ground balance your unit properly.
10) Always Read the Manual
Although it may be a boring step, especially when you are excited to get out and find treasure, always take the time to read the manual that comes with your metal detector or pinpointer. Many manuals will have information for proper settings in each type of environment and will have information for ground balancing, as mentioned above.
Knowing the manual will help ease the learning curve if you’ve switched to a new machine, and they are full of information designed to get you out and detecting quickly and easily.
If you have any questions or are having trouble understanding something in the manual or on the detector, the manufacturer’s phone number should be on each manual. Give them a call and they can help you. You can also look online for forums or video help.
11) Know the Laws
Each state in the U.S. has its own laws regarding metal detecting. There are many layers of law regarding metal detecting:
- Federal laws
- State laws
- County laws
- City or town laws
- School district laws
- Park laws
Each entity will have its own regulation pertaining to metal detecting, and some require special permissions to detect. Be sure to check with local, state, and federal agencies to fully understand your responsibilities in obtaining permission.

Often, this information can be found on the entity’s website. I have seen many articles stating that metal detecting on federal or state lands is always forbidden.
This is not the case. National Forest land allows detecting while prospecting. Any type of prospecting on Forest Service land is subject to General Mining Laws and only allowed in areas not containing historical or culturally relevant historical resources.
It is important to know the laws for each area you will be detecting in to make sure you’re not socked with fines. Always follow private property laws when detecting and be familiar with artifact laws in case you come upon a historical site or object.
Be aware always where you are detecting. You can accidentally wander onto private property, or if you live in an area like mine, onto someone else’s claim.
- You might also like: Metal Detecting Laws: Where Can I Detect Treasure?
12) Safety First!
One of the most important safety tips when metal detecting for gold is always to be aware of your surroundings. Always make sure someone knows where you are headed and when they can expect to hear from you. While cell phones can produce electromagnetic interference with metal detectors, it is a good idea to keep one along; just make sure it’s turned off if it begins to interfere with your detecting.
In my experience, my phone didn’t interfere with my detector, but it does happen. If you will be detecting in or near water, make sure you are wearing footwear with good traction, so you do not slip. It would be awful to ruin your beautiful new metal detector from falling in the water (if it’s not fully waterproof).
So be careful out there!
13) Search Where Shallow Gold Was Found
Often, these areas have been searched, but not with newer equipment. New high-tech gold metal detectors can search deeper. As with old mine sites, just because an area has been searched doesn’t mean it is devoid of gold!
14) Know the Geology of Your Area
You should always research the geology of mining areas or search areas. There are natural gold indicators that can be found in gold producing areas, but each area is unique. Look for quartz, granite, schist, and gneiss. These types of rocks are present in most places where gold is found. Vertical schist has been known to have larger nugget gold, so look for schist in vertical formations.
15) Look for Quartz
Quartz is an extremely abundant material and is often found in gold bearing areas. Keep in mind that there are thousands of areas where quartz is common, but gold has never been found. So, quartz does not necessarily equal gold.
But if you happen to be in an area known for gold, pay attention to the quartz! Using a good quality gold metal detector is the preferred method for identifying gold in quartz without having to mine.
16) Identify Direction of Geological Formations
Identifying the direction of the geological features in your area is important. In many western states, mountain ranges are typically northwest-southwest. Look for areas where other rock types enter at different angles to the general geology. Many of the richest gold areas have intrusions such as these that are 90 degrees to the regional geology.
17) Look For Contact Zones
Contact zones, also called dykes or intrusions, are places where two major rock types come together. This is a natural process resulting in rapid heating and cooling, which are the perfect conditions for gold to have formed. Pressure and high temperatures cause fissures that often resulted in gold formation.
Gold was then pushed to the surface, making it accessible without needing to dig underground. Identifying contact zones is difficult at first but will become easier as you study the geology of your region.
18) Look for Color Changes
Changes in soil color can be important indicators of contact zones. Sometimes bedrock has eroded leaving only soil. You may see a band of red colored soil, indicating the presence of an old iron intrusion. The host rock has eroded but the red soil and possibly gold will remain. In many areas, ground changes can be subtle, or hidden by vegetation.
19) Keep an Eye Out
If you see a pile of rocks that seem completely out of place for the area, there could be something worth checking out in them! The theory is that miners transporting ore to the nearest mill had issues with their transportation and had to unload their wagons and limp on to the nearest town for repairs.
They were not always able or willing to return to the area where their materials were left. So, if you see a pile of rocks or soil seemingly out of place, give it a scan with your gold metal detector and make sure you’re not missing something great!
20) Research Old Geology Maps
When researching where old mining activity has taken place, it can be a good idea to view old geological reports to determine the prevalence of different rock types found at specific mining sites. You are much more likely to find areas still containing gold if you study areas where gold has already been mined.
21) Look For Glacial Outwashes
Many areas in the U.S. have remnants of glacial movement. These glaciers moved south from Canada millennia ago and brought with them Canadian gold! As these glaciers receded, small bits of gold were left over. These gold pieces may be quite small due to the ferocity of glacial movement, but a good gold metal detector will be able to pick up small nuggets!
22) More Research!
One thing I find very helpful is to look for gold detecting books in my local area. I recently purchased a book detailing the best places to find gold deposits in Utah. Books like this make looking in your chosen area much easier as they can give you a good starting point. As mentioned previously, geological maps are a great tool, but also consider looking over mining reports.

These were typically completed by the U.S. Geological Survey, Bureau of Land Management, and local state agencies so they have specific details regarding mines and resources. Old newspaper articles found at your local library or museum will often give insight on where gold has been found.
23) Look for Black Sands
Black sands are iron rich sands typically composed of magnetite and hematite. The composition of these sands is one reason you want a metal detector with good ground balancing. Typical metal detectors will go crazy when detecting in black sandy areas. Keep in mind black sand does not automatically mean there is gold. Black sands can be prevalent in areas with no gold. Pay attention to black sand in areas where gold has already been found.
24) Where to Look in Desert Areas
Most gold is located on bedrock or in exposed crevices. Always check for bedrock when searching for a place to find gold. Gold in desert areas can be moved by flash flooding making washes a great place to find gold.
Check the banks of washes also for any pieces that may be the next to wash down during a flood. Also look for old mining tailings. Dry-washing equipment misses gold when the dirt is screened, and dry-washers do not separate wet dirt well, so the gold often flows into the tailings.
25) Where to Look in Mountain Areas
In mountainous areas, rivers and streams, especially near bedrock, are the best places to check. You can also seek out old mines, although you should not enter them for safety reasons. Instead, as in desert areas, look for tailing piles, around mills, and old hauling roads. Anywhere bedrock is visible there is a possibility for gold. Look under rock piles and near dry river channels.
26) Detecting on Land
Gold nuggets are best searched for in areas where they have previously been found. Near old mines is one of the best places to find gold. There are thousands of abandoned mines scattered throughout the United States. Do some research on mines in your desired search area to see what types of ore the mines pulled up. As mentioned previously, it is important to never enter an abandoned mine.
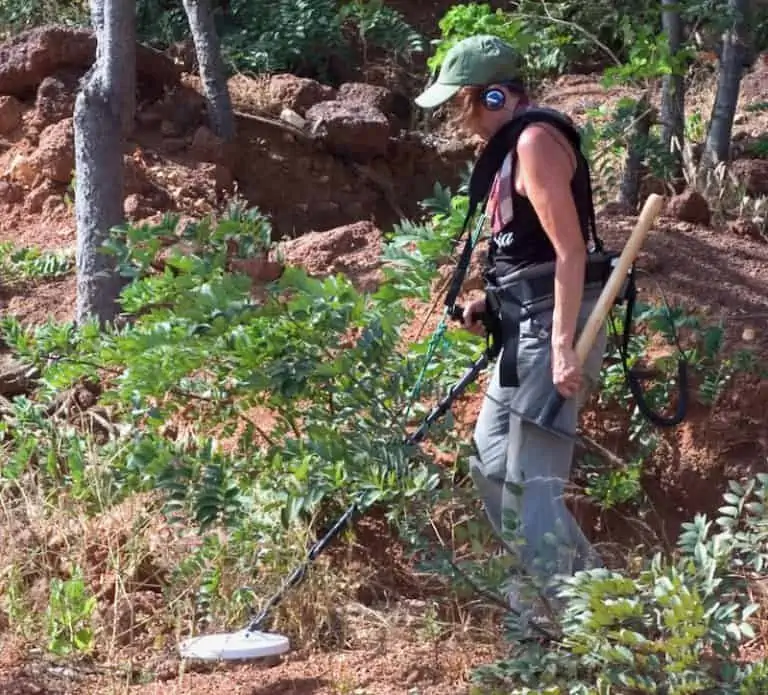
By this point, you should have your chosen detector which is good in highly mineralized soils. Adjust your settings for the area and begin sweeping the detector while listening for signals.
27) Detecting in Water
Detecting in water can result in finding gold. Gold naturally accumulates in waterways and digging the gravel within them can yield gold nuggets or flakes. Look for areas where the water slows down as this is where gold will accumulate. As with land-based detecting, make sure your settings are correct for the area.
Also ensure your detector’s coil is completely waterproof if you will be hunting in the water. Remember, gold is the heaviest substance found in a creek or river and often falls to the bottom in predictable locations.
28) Detecting in Creeks
Creeks are one of the most common places to find bits of gold. For water hunting of any type, you will want a waterproof coil. The control box does not have to be waterproof, just be sure not to fully submerge the machine.
Look for areas where there is an increase in depth, rocks that make the water flow slower, and the base of waterfalls. These areas are the most common for finding gold as the denser gold has sunk to the bottom with the water/depth change.
29) Finding Gold on Beaches
Some of the richest beaches for detecting gold are those in Alaska. However, Oregon and Washington have had gold discoveries along their beaches. Much of the gold found along beaches will be small, but if you stumble upon an area with enough small bits it sure adds up!

Black sands on beaches are a good indicator gold might be present. You will need to make sure you have a metal detector that not only detects gold well, but is good in saltwater areas, too.
30) Search on Public Lands
There are millions of acres of public lands open to prospecting. Anyone can go in using small scale equipment, like metal detectors, and look for gold. If you do find gold, you are free to keep it.
These lands are typically managed by the Bureau of Land Management of Forest Service. Most of these lands are in the western United States. Most of this land is in the following 12 states:
- Washington
- Oregon
- California
- Arizona
- Nevada
- Idaho
- Montana
- Wyoming
- Utah
- Colorado
- New Mexico
- Alaska
Again, always check local laws regarding metal detecting and prospecting before hunting.
31) Know Off-Limit Areas
All wilderness areas are off-limits to any type of prospecting, including metal detecting. Areas of special designation will also be closed to metal detecting. So, while there are places you cannot metal detect and prospect, there are many more places where it is perfectly legal.
32) Don’t Be a Claim Jumper!
Some areas where gold has/is found have been claimed by others. It is important for you to pay attention to whether you are on someone’s claim. Most claims in my area of SW Idaho allow you to recreate on the property, but there is no metal detecting, sluicing, or removing materials. Most claims I have seen are posted on trees or signposts in the areas, dictating the claim owner and the effective dates.
33) Dig Every Target if You are a Beginner
Goldfields are often littered with a lot of trash items like nails, horseshoes, cans, iron fragments, bullet casings, etc. While it can seem overwhelming to dig every target knowing these areas can be littered with trash, it will really help you learn the sights and sounds of your detector and become more familiar with how it functions.
Once you learn more about the settings of your detector and the sounds each item makes, you can begin discriminating so you don’t have to dig so many holes. Remember, you may dig hundreds of trash targets before finding one gold target. But don’t give up!
- You also might like: Metal Detecting Tips and Tricks for Beginner Detectorists
34) Metal Detect After Storms
Deposits of gold are replenished after large storms. Heavy rains cause erosion along hillsides allowing more gold to move down into the creek or river. Springtime is the most common for storms, unless you are in the desert. Then you will want to wait until monsoon season and check the areas where the water flowed over the desert.
Dry desert washes can go years without being disturbed but one flash flood can cause considerable changes. It can also expose fresh bedrock where gold has been hidden. Because of this cycle, most areas will never be “mined out,” as they are constantly replenished by storms.
35) Consider a Gold Test
It can be a good idea to bring a small gold nugget (or ring, something pure gold) with you. Make sure this nugget is glued to a poker chip, or something bright and non-metal. Place the item on the ground and run the detector over it.
If you are in an area with a lot of iron or trash (which many gold fields are full of) this can help tune your ear to the sound of gold. This can help you differentiate between an iron nail, bit of lead, and a nugget of gold, as the sounds can be quite similar.
36) Always Check Your Tailings Piles
As you detect you dig. As you dig you no doubt move soil from one area to another. Don’t simply throw this soil back into the hole! Always check your tailings before filling the hole you have dug, as there could be flakes or small bits of gold in them.
What I like to do is use a plastic scoop or dump the soil into my hands, then run that across the coil and listen for any indication of a target. Once your tailings are checked, you can refill the hole you’ve dug and move on.
37) Pay Attention to Gold Textures
When you detect and dig gold, be sure to look at the texture of the gold. This can help you determine where it came from. Smooth, water-worn gold has travelled a good distance. But jagged, rough textured gold has not typically travelled too far from its source.
Continue to move upstream with your detector an you may be able to pinpoint the gold’s origin. This could lead you to a rich concentration of nuggets!
38) Should You Stake a Claim?
If you’ve been detecting an area and are finding rich gold deposits, you may wish to stake a claim on the land. Claims give you exclusive mineral rights so you are the only one who can find and remove minerals from the area. You must keep your claim active. Be aware that staking a claim does not make the land yours.
The land is still public property, and anyone can recreate in the area. The only thing they cannot do is remove minerals. There are 19 states, mostly in the western U.S. where you can file a mining claim. Be sure you have good reason before staking a claim, so you are not wasting money. Staking a claim can ensure you have ample time to detect the area before moving on.
39) Don’t Get Stuck With Someone Else’s Claim
If you happen to see a claim up for sale advertising there is gold in the area, be sure to do your homework before you jump onboard. Many sellers will provide assay reports, recent and historical, showing the area is rich in gold. Don’t go solely based off this report.
They can often be inaccurate as claim owners will only select the very best pieces of ore to be analyzed, skewing the reports. Buyer beware!
40) Use the Proper Sweeping Technique
Gold gives off a subtle target sound. If you swing your detector too quickly, you can increase ground noise which will mask the sound of a gold target. Keep the search coil close to the ground, swinging slowly and smoothly to increase your chances of hearing a gold target.
41) Hunt with Headphones
As mentioned in the Accessories section of this list, using headphones while hunting for gold can increase your chances of hearing a target. Not only do headphones help block out any outside noise, but the faint sound emitted by gold targets will be easier to hear through headphones.
- You might also want to read: What Are the Best Headphones for Metal Detectors?

42) Use Quality Digging Tools
Even the most experienced gold hunter will spend a good portion of a hunt digging. To maximize your potential for finding gold, be sure you are using good quality digging tools to help you focus on speeding up your target recovery. The faster you can dig a target the faster you can move on.
43) Travel Light But Smart
Gold hunting is not easy! You will likely find yourself in differing terrain: up and down hills, through brush, through water, in the hot sun, being scratched by rocks of plants, or being bothered by mosquitoes. Focusing on these uncomfortable things can cause you to lose focus or desire to keep hunting. Be prepared by using sunscreen and bug spray before you leave your camp or car. Bring only items you will absolutely need.
I like to bring a backpack with a few basic survival items like water, food, emergency blankets, first aid kit, fire starter or waterproof matches, my cell phone, a sweater or jacket, and my hunting accessories. My backpack has loops on the side to hold my pick hammer and shovel. This way, the pack isn’t terribly heavy, and I have all that I need for the day, and enough to keep me focused in case of an emergency.
44) If You Find Gold, Stay in the Area
If you find a gold nugget or flake, keep searching the nearby area. Be diligent in searching in a large radius around your discovery. You want to make sure that no other nuggets or flakes are nearby.
45) Mum’s the Word
If you do find an area rich in gold, while you may be tempted to shout it from the mountain tops, keep quite about it! You may tell one person, and they may tell 10 others.
If you have not staked a claim on the land in question, any of those 11 people can go up and detect or mine in your newly discovered area.
46) Stay Focused and Determined
This is one of the main secrets to finding gold. You need a positive mindset. You need to remind yourself that there IS gold out there and you ARE going to find it! Even the best gold hunters have days, weeks, or months where they don’t find a single nugget.
Keeping yourself motivated and positive will make your hunt more enjoyable. You can’t win 100% of the time, so remember even if you’re only finding old iron targets or trash, you can remove those items from the earth making it better than you found it.
47) Consider Joining a Metal Detecting Club
There are hundreds of metal detecting clubs in the United States. You can go to a general club or one more specifically targeted to metal detecting for gold. These can be great places to get information and tips from others.
48) Consider Joining a Prospecting Club
If a metal detecting club is not for you, or you can’t seem to find one specific to finding gold, you can always join a prospecting club. As with a metal detecting club, these individuals may have knowledge for you to learn and you can meet like-minded individuals.
- You also might enjoy: Are Metal Detecting Clubs Worth Joining?
49) Good Equipment = Successful Hunt
As mentioned in the earlier part of this article, it is critical to have the proper equipment for metal detecting gold. You won’t have as much success if you have a poor-quality metal detector, or one without good ground balancing. Metal detecting is becoming more and more popular, and detectors are being made for a multitude of environments.
A good gold specific detector is always going to be your best bet. You can certainly find gold with a poorer quality detector or one not specific to gold, but you will be digging a lot of unnecessary targets. Always take good quality tools, and proper tools for your hunt. And always be safe!
50) Enjoy Next Treasure Hunt
This is one of my favorite tips. If you don’t love what you are doing, don’t do it. If you love metal detecting, hearing the detector indicate a target, wondering what that target could possibly be, unearthing that target, collecting and moving on, you will have a blast hunting for gold.
Yes, it’s hard work. Yes, there is a good chance you won’t find something every single time. But if you stay positive, work hard, stay focused, plan well, be prepared, and have fun you will not have wasted a single moment.
- If you enjoyed this article, please “like” our Facebook page!
You Might Also Want to Read:
