Garrett AT Max review: A top metal detector?
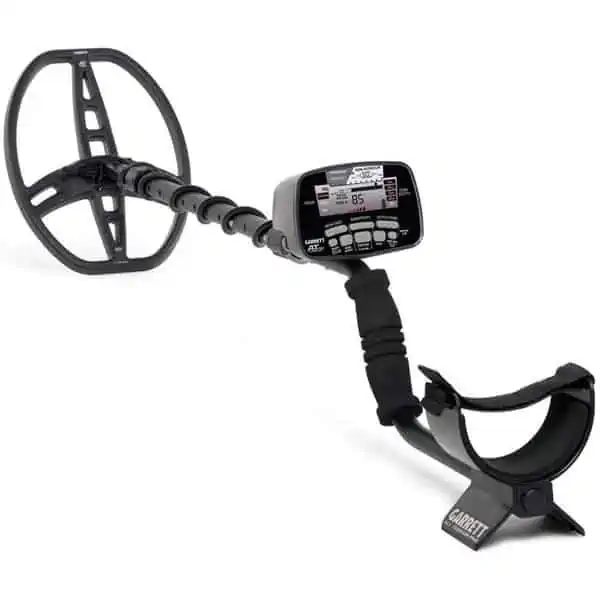
There’s nothing more important than having a reliable metal detector with you when you’re going treasure hunting. And when it comes to the Garrett metal detectors, many detectors very much appreciate their reliability.
In this Garrett AT Max review, I’m going to break down exactly what you can expect to get from this metal detector, especially when it comes to notable features and how you can use them. We’ll even try and compare the Garrett AT Max to the Garrett AT Pro in an effort to help you decide which one’s better for your needs.
Below, please take a moment to directly compare the Garrett AT Max to other noteworthy metal detectors currently on the market.
| Photo | Model | Price | Features |
|---|---|---|---|
 | Garrett AT Max | $$$ | Waterproof to 10 feet |
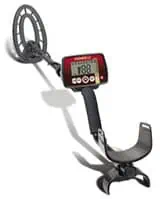 | Fisher F22 | $$ | 9″ Triangulated Concentric Coil |
 | Garrett Ace 400 | $$$ | 8.5 x 11" DD coil |
 | Minelab Vanquish 540 | $ | Search Modes: Coin, Relic, Jewelry, Custom, All Metal |
What the Garrett AT Max Offers You
The Garrett AT Max is an all terrain metal detector, so you’ll be able to use it to search for relics, coins, jewelry and much more. It can even go into the water, as it’s capable of being submersed up to 10 feet (3 meters).
One really great feature that comes with the AT Max is the built-in Z-Lynk wireless technology. Coupled with this technology are Garrett’s own MS-3 headphones.

Below, please take a quick moment to view some of the best selling metal detectors on Amazon, and then see how well they stack up to the Garrett AT Max:
| BEST SELLERS |
|---|
| 1) Garrett AT MAX |
| 2) Bounty Hunter TK4 Tracker IV |
| 3) Bounty Hunter Gold Digger |
Z-Lynk Wireless Technology
With Z-Lynk technology, you hear your target signal when your search coil is directly over the target with no delay. And with Z-Lynk being six times faster thank bluetooth speeds, you don’t have to worry about missing a signal due to a delay of the tech alerting you of buried treasure.
And this is of course very important, because even a slight delay in detection can cause you to continue further down your path in the woods or at the beach or campgrounds, making it all the more difficult to exactly pinpoint where potential buried gems are because the signal was delayed getting to your headphones.
It should also be noted that, in order to connect a new pair of headphones to the machine, you need to pair it to the detector. To do that, what you do is hold both the headphones and the detector near one another. Then, press and release the Frequency and Iron Audio buttons at the same time.
After that, you’ll likely see a Z-Lynk icon that appears on the middle-right side of the screen. If you see that the image is solid (and the image resembles a headphone-looking icon), you know the headphones are successfully paired.
If the image is blinking, that means it’s searching for the headphones to pair with the machine.
If there comes a time when you want to unfair your headphones, just make sure to hit those two same buttons (Frequency and Iron Audio) simultaneously.
One last thing on headphones before moving on. Although you can submerge the AT Max into 10 feet of water, the wireless headphones do not have this ability. And so, whenever you want to detect treasure that’s buried underwater, you’re going to want to use wired headphones.
Notable Features
The Garrett AT Max features a true all metal mode and an optimized frequency of 13.6 kilohertz. What’s nice about this is that it provides great detection on a wide range of targets—including things you’ll likely want to search for (coins made out of silver, brass targets, jewelry, etc). The detector is even sensitive enough to pick up very small gold nuggets, although it should be noted that if it’s your aim, you should probably go out and purchase an optional 5” x 8” DD coil.
The detector also features 175 points of high res ground balance, which is great for handling conductive soils (such as salt water beaches) and highly mineralized ground.
You also get a very helpful LCD screen that features a backlight, so you won’t be out of luck once the sun goes down.
On top of that, you get a nice textured and non-absorbent handle grip, which is nice and prevents your hand from dropping the detector if it gets a little wet from the rain or even sweat on a hot day.
Target ID with the AT Max
Now at the very top of the AT Max, you’ll notice what’s described as a Legend. You’ll see that Iron items are on the left of the Legend, while more conductive items will be found on the right. U.S. coins will be identified on this Legend as well, so think of it as your easy to access guide or cheat sheet when it comes to what you may end up detecting.
Now, when you’re detecting, if there is a piece of metal that’s “accepted” by the machine, you’ll end up hearing an audible noise or signal or beeping sound. You’ll also see a cursor appear on the LCD screen.
By contrast, whenever the AT Max finds an item that it doesn’t “accept” (meaning, the machine basically doesn’t believe that what you’ve stumbled across is something you’ll really care about, like a bottle cap for instance), then the machine won’t beep or signal you. Despite the machine not making a sound to alert you, you will still notice that a cursor appears on the LCD screen.
So, in the above scenario, the machine wants to quietly inform you that you’ve found something, despite it likely being trash. But it’ll only make noise if you’ve found something that’s believe to be higher value (gold nuggets, coins, relics, jewelry, etc).
On top of that, the right side of the display shows the estimated coin depth of any item you’re detecting. You’ll notice that it begins at 2” and goes all the way to 10”+.
This detection grip or display is ultimately based on coin-sized objects. And it’s important to now that items that are actually bigger than a coin, such as a big relic, might ultimately be buried deeper underground than the indicator on the LCD screen is suggesting. And by contrast, items that are smaller than the size of a coin, like a gold nugget or two, may be in closer to you (not buried as deep) than the estimated depth indicated on the LCD screen.
The Many Modes of the AT Max
Now on the left side of the LCD screen, you’ll notice that there are a variety of modes available that you can select. The first is called All Metal mode, followed by Custom, Coins, and then Zero.
In All Metal mode, you’re provided with the greatest detection depth and sensitivity. When operating the machine, you’ll hear subtle signals coming from even the faintest buried target.
Since All Metal mode doesn’t have any discrimination, all types of metal (even things you may not want, like bottle caps or clips or foil) will be detected.
Let’s now move onto Custom mode, where you can save your own discrimination pattern. This means that if you want the machine to deter coins or rings, etc (or, perhaps if you don’t want the machine to detect these metals), you can set up your pattern and save it to the machine. Doing this allows for the AT Max to remember your setting, saving you the time of having to re-enter it again in the future.
Next up is Coins Mode. Now, Coins Mode is exactly what it sounds like—it helps you find all U.S. coins. With that said, it’s also nice because it’s a mode that’s specifically set up to not detect trash or items it knows you likely wouldn’t want, like pull tabs or foil. The only real downside of this downside of this mode is that really small jewelry—like a very small earring, for example, could potentially be missed or go undetected in Coins Mode.
And lastly, we have Zero discrimination mode. You would ideally use this mode when your target’s signal isn’t very consistent. Or, you just aren’t entirely positive what it is you want to hunt, and you’re essentially open to finding anything buried under the soil.
A lot of people will probably wonder what is the difference between All Metal mode vs Zero discrimination mode. And one notable difference is that with Zero discrimination mode, you actually hear different ID tones for various metals. This helps you install determine what is most likely buried under the ground.
How Audio Tones Work on the AT Max
Speaking of Audio Tones, this probably a perfect area to discuss the tones you can expect to hear when you buy the AT Max.
Now, when you’re using any go these three discrimination modes (Custon, Coins or Zero), the AT Max has three pretty distinct tones it will make based on the conductivity of the target.
The first tone is low—it’s for anything that has a digital target ID rating from 0 to 34. So if you run across an iron nail, for example, this is the tone you’ll hear in your headphones.
Next up is a high pitched tone, which is a mid-tone. You’ll hear this tone for anything that has a digital target ID rating of 35 to 75. If you happened across a gold ring, you would hear a mid-beeping tone in your headphones.
Last but not least is the high pitch tone. This is for any item that has a target ID rating higher than 75. You’ll hear this tone whenever you come across a U.S. quarter, for example.
One quick thing I think is worth mentioning here. If you were to use the All Metal Mode (as opposed to the Custom, Coins, or Zero modes) no matter what you discover on or beneath the ground, you’ll always only head a mid-tone…except if you were using All Metal Iron Audio.
How the Iron Audio Mode Works
Now, if you turn this mode on, and you use it in conjunction with your discrimination modes (or your All Metal mode), you’ll notice that when you move the detector over metals that have iron (and specifically, things you likely don’t want, like the cap of a bottle), the detector will make a pretty unique sound (sort of like a low-medium-low beeping sound).
This sound will always be triggered whenever you detect an item with iron in it. And what this does is save you the time of having to dig up the ground…only to discover you’d found a soda bottle cap.
Just always make sure to turn on Iron Audio mode first, then set you discrimination setting to whatever you prefer (44 is the maximum Iron discrimination level you can have).
Garrett AT Max vs Garrett AT Pro
I also wanted to take a quick moment to compare the AT Max to the AT Pro. And one of the biggest differences that stands out to me is Z-Lynk wireless technology.
The AT Max features Z-Lynk (the AT Pro does not), which is faster than bluetooth and works well with the Garrett MS-3 headphones. Not using Z-Lynk means you may have to deal with a possible delay in detection, causing you to possibly miss some buried treasure and having to circle back to find it.
There’s also no backlight available on the AT Pro, while it’s present on the AT Max. So if you had plans to go metal detecting either at night or towards the end of the day and on into the evening, you’ll either need to pack a flashlight to read the LCD screen or simply purchase the AT Max.
Conclusion
The Garrett AT Max is a wonderful metal detector. It has tons of features to get you properly up and running And the metal detector is relatively cheap enough (under $,1000) that it won’t break your bank.
If you enjoyed this article, please “like” our Facebook page!
